Ever been on a call, and the other person keeps saying, “I can’t hear you”? Or maybe Siri isn’t recognizing your voice? If so, your AirPods microphone needs cleaning. Over time, dust, earwax, and debris can clog the tiny mesh, affecting sound quality. Learning how to clean your AirPods microphone properly can instantly fix muffled audio and restore crystal-clear sound.
I’ve been there. My AirPods Pro, which always worked perfectly, suddenly made my voice sound far away. I tried resetting them still no luck. Then, I checked the microphone mesh and saw it was covered in tiny dust particles and buildup. A careful cleaning made all the difference.
In just a few minutes, you’ll learn how to clean your AirPods microphone safely using Apple-approved methods. No risky DIY tricks just simple, expert-backed steps to restore clear sound and improve call quality. Let’s get started.
Tools & Materials Needed for Safe Cleaning
Before you start, make sure you have the right tools. Using the wrong materials like sharp objects or too much liquid can damage your AirPods microphone. Stick to these safe, Apple-approved options:
- Microfiber Cloth: Wipes away dust without leaving lint.
- Soft Brush (Anti-Static or Toothbrush): Loosens stuck debris without pushing it deeper.
- Cotton Swabs: Perfect for gentle spot cleaning around the mic.
- 70% Isopropyl Alcohol: Helps disinfect and remove grime just don’t overdo it.
- Blu Tack or Cleaning Putty: Lifts out dirt from the tiny mesh without damage.
- Compressed Air (Optional): Can clear fine dust, but use it lightly and from a distance.
That’s it! These simple tools will help you clean your AirPods safely and effectively. Now, let’s get to the actual cleaning process.
Apple’s Official Guidelines on Cleaning AirPods Microphone
Apple has clear guidelines for cleaning AirPods safely. If you use the wrong methods like too much moisture or sharp objects you could damage the microphone permanently. Here’s what Apple recommends:
What’s Safe to Use?
- Dry, lint-free microfiber cloth – Best for wiping away dust.
- Soft brush or cotton swab – Gently cleans the microphone mesh.
- 70% isopropyl alcohol (lightly dampened on a cloth) – Helps disinfect and remove grime.
What to Avoid?
- Water or liquid cleaners – Moisture can seep inside and cause damage.
- Compressed air – Too much force can push debris further in.
- Sharp objects (pins, toothpicks, paper clips) – These can puncture or tear the microphone mesh.
For best results, stick to Apple’s safe methods and clean your AirPods regularly. Up next, let’s go through the step-by-step cleaning process.
Step-by-Step Guide to Cleaning Your AirPods Microphone
If your AirPods microphone sounds muffled, dirt and debris might be blocking it. A clogged mic can affect call quality, Siri commands, and voice recordings. Cleaning it properly will restore sound clarity without damaging your AirPods. Follow this safe, step-by-step process recommended by experts.
Step 1: Prepare Your AirPods for Cleaning
Before cleaning, set up a dust-free workspace and ensure:
- AirPods are disconnected from all devices.
- They are placed on a clean, dry surface.
- Hands are washed and dry to prevent adding oil or debris.
This prevents further contamination and ensures a smooth cleaning process.
Step 2: Remove Surface Dirt and Debris
The first step is to dislodge loose dust without pushing it deeper:
- Use a soft-bristled brush (anti-static or a clean toothbrush).
- Gently brush the microphone mesh in circular motions.
- Hold the AirPods upside down so dirt falls away instead of going inside.
If the mic is still clogged, move to the next method.
Step 3: Clean with a Dry Cotton Swab
For fine dust trapped in the mesh, use a dry cotton swab:
- Lightly wipe the microphone area in small, circular motions.
- Avoid pressing too hard this can push debris further inside.
- If needed, use a fresh swab and repeat the process.
This removes most dirt while keeping the AirPods safe from damage.
Removing earwax from AirPods mesh is essential for clear audio. Follow these steps to clean earwax buildup without damaging the delicate mesh.
Step 4: Remove Stubborn Dirt with Blu Tack or Cleaning Putty
If dust is still trapped, use Blu Tack or a dust-cleaning putty:
- Take a small piece and lightly press it onto the microphone mesh.
- Peel it away gently this lifts out hidden debris.
- Repeat until the mesh looks clear and no more dirt comes out.
This method is highly effective and non-damaging.
Step 5: Deep Cleaning with Isopropyl Alcohol (Only If Needed)
If your microphone still sounds muffled, use isopropyl alcohol for a deeper clean:
- Lightly dampen a cotton swab with 70% isopropyl alcohol (do not soak).
- Gently dab the microphone mesh to break down stuck debris.
- Let your AirPods air dry for at least 10 minutes before using them.
Never apply alcohol directly onto the AirPods. This step should only be used as a last resort.
Final Tip: To keep your AirPods microphone clean, wipe them down weekly with a microfiber cloth and avoid storing them in dusty pockets or bags.
By following these steps, you can restore your AirPods microphone to full clarity and improve call quality instantly.
How to Clean AirPods Pro Mesh & Speaker Grill Without Damage
If your AirPods Pro microphone sounds muffled or the speaker grill is clogged, it’s likely due to dust, earwax, or debris stuck in the fine mesh. Over time, this buildup can affect sound quality, noise cancellation, and call clarity.
Unlike regular AirPods, AirPods Pro have multiple mesh-covered vents that require a careful cleaning approach to prevent damage. Follow this safe, step-by-step method to restore your AirPods Pro to peak performance.
Understanding the Difference: AirPods vs. AirPods Pro Microphones
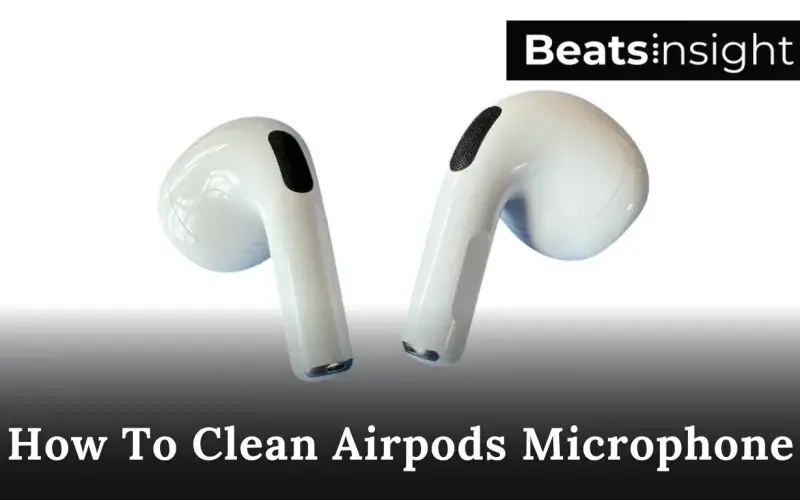
- AirPods (Standard Models): The microphone is located at the bottom of the stem, covered by a small mesh grille.
- AirPods Pro: These have multiple vents and mesh areas one on the stem for the microphone and another on the outer side for noise cancellation and pressure balance.
Because of these extra openings, AirPods Pro require a slightly different cleaning technique to ensure dirt isn’t pushed deeper inside.
Step-by-Step Guide: Cleaning AirPods Pro Mesh & Speaker Grill without Damage
Step 1: Remove Surface Dust and Debris
Before deep cleaning, clear away any loose dirt:
- Use a soft-bristled brush (such as a clean toothbrush or anti-static brush).
- Gently brush the microphone mesh and speaker vents in circular motions.
- Hold the AirPods downward to let dust fall away instead of getting trapped inside.
This prevents long-term clogging and keeps sound quality clear.
Step 2: Use a Dry Cotton Swab for Fine Dust Removal
If dirt is still visible:
- Take a dry cotton swab and gently wipe the microphone and speaker mesh.
- Avoid pressing too hard—this can force debris deeper inside.
- Use a fresh swab if the first one collects a lot of dust.
This step removes fine dust particles without damaging the mesh.
Step 3: Use Blu Tack or Cleaning Putty for Deep Cleaning
For stubborn dirt trapped in the mesh:
- Press a small piece of Blu Tack or cleaning putty gently onto the microphone mesh.
- Slowly lift it off to pull out hidden debris without pushing it further inside.
- Repeat as needed until the mesh looks completely clear.
This method is highly effective and non-damaging, especially for AirPods Pro’s fine mesh structure.
Step 4: Wipe with Isopropyl Alcohol (Only If Necessary)
If your microphone or speaker grill still sounds muffled, a light cleaning with 70% isopropyl alcohol may help:
- Lightly dampen a cotton swab (do not soak it).
- Gently dab the microphone mesh and speaker vents to break down stuck residue.
- Let your AirPods air dry for at least 10 minutes before using them.
This should only be used when absolutely necessary, as excess liquid can cause damage.
Dust and debris can get trapped in AirPods Max mesh just like in the microphone. Here’s an expert-backed method to clean the mesh without damage.
Best Practices for Keeping AirPods Pro Mesh & Speaker Grill Clean
- Wipe your AirPods Pro after each use to prevent debris buildup.
- Store them in a clean case to minimize dust exposure.
- Avoid blowing compressed air into the vents it can push dirt deeper.
Regular cleaning ensures your AirPods Pro sound crisp and function perfectly.
How to Clean Your AirPods Case for Optimal Performance
If your AirPods case looks dirty or isn’t charging properly, dust and debris could be the problem. A dirty case can transfer grime to your AirPods, affecting the microphone, speaker mesh, and overall performance. Keeping it clean ensures clear sound quality and proper charging.
Follow these simple, expert-backed steps to clean your AirPods case without causing damage.
Step-by-Step Guide to Cleaning Your AirPods Charging Case
Wipe the Exterior with a Microfiber Cloth
- Use a dry, lint-free microfiber cloth to remove smudges, dust, and fingerprints.
- If stains remain, lightly dampen the cloth with 70% isopropyl alcohol and wipe again.
- Avoid soaking the cloth excess moisture can damage the case’s hinge and charging components.
Clean the Inside of the Case (AirPods Slots & Lid)
- Use a dry cotton swab to remove dust from the inner walls and hinge area.
- Focus on the AirPods slots, where dirt and lint tend to accumulate.
- If needed, slightly dampen the swab with alcohol to break down stubborn grime but never use excess liquid.
Carefully Clean the Charging Port (Without Damage)
- Use a soft-bristled brush or dry cotton swab to remove debris from the Lightning port.
- Never insert sharp objects like toothpicks, as they can damage the charging connectors.
- Avoid blowing compressed air into the port, as it may push dirt further inside.
Best Practices to Keep Your AirPods Case Clean
- Wipe down the case weekly to prevent dust buildup.
- Avoid storing it in dusty pockets or dirty surfaces use a protective cover if needed.
- Never use water, harsh chemicals, or excessive liquid, as they can damage the case.
By following these steps, your AirPods case will stay clean, your AirPods will charge properly, and your microphone will remain clear. A little maintenance goes a long way in keeping your AirPods working like new.
What to Avoid When Cleaning Your AirPods Microphone
Using the wrong cleaning methods can permanently damage the microphone mesh. Avoid these common mistakes to keep your AirPods working like new.
- Sharp Objects – Toothpicks, pins, or needles can tear the mesh or push dirt deeper. Use soft tools like a brush or cotton swab instead.
- Water or Cleaning Solutions – AirPods aren’t waterproof. Even a little moisture can damage the internal components. Stick to a dry or lightly dampened cloth.
- Compressed Air – The pressure can force dust deeper into the microphone, making it harder to clean. A gentle brush is a safer option.
- Scrubbing Too Hard – The microphone mesh is delicate. Too much force can wear it down over time. Clean gently to avoid damage.
Stick to safe, Apple-approved cleaning methods, and your AirPods microphone will stay clear and functional for longer.
Moisture inside the microphone mesh can cause muffled sound. Here’s an expert-recommended method for removing water from AirPods before it causes issues.
How Often Should You Clean Your AirPods Microphone?
To keep your AirPods microphone clear and working properly, clean it every 2 to 4 weeks. If you use them daily, you may need to clean them more often.
When to Clean More Frequently
- Earwax buildup – Frequent use can clog the microphone.
- Dust exposure – Storing AirPods in pockets or bags traps dirt.
- Sweat and moisture – Gym use can lead to clogged mesh.
Signs It’s Time for Immediate Cleaning
- Muffled sound during calls.
- Siri doesn’t recognize commands.
- Visible dirt on the microphone mesh.
A quick wipe now prevents bigger issues later. Regular maintenance keeps your AirPods sounding crisp and working like new.
Troubleshooting: Microphone Still Not Working After Cleaning?
If your AirPods microphone still sounds muffled, try these quick fixes:
1. Reset Your AirPods
- Go to Settings > Bluetooth and forget your AirPods.
- Place them in the case, close the lid, and wait 30 seconds.
- Press and hold the setup button until the light flashes white.
- Reconnect and test the microphone.
Sometimes, reconnecting your AirPods to a different device can solve microphone issues. Follow this guide to set up AirPods with your laptop step by step.
2. Check for Software Updates
- Outdated firmware can cause microphone issues.
- Connect your AirPods to your iPhone and check for updates under Settings > Bluetooth.
- Updates install automatically when AirPods are connected to Wi-Fi.
3. Contact Apple Support
- If the microphone is still muffled, visit Apple’s support page for diagnostics.
- If under warranty or AppleCare, you may be eligible for a replacement.
4. Consider Replacing Your AirPods
- If none of these steps work, the microphone may have permanent damage.
- If your AirPods are several years old, upgrading might be the best option.
Most issues are fixable with a reset or update, but if your mic is still not working, Apple Support can help.
Microphone issues often come with low audio output. Here’s a simple guide on boosting AirPods volume for a better listening experience.”
Preventative Tips to Keep Your AirPods Microphone Clean
Keeping your AirPods microphone clean prevents muffled sound and extends their lifespan. Follow these simple habits:
- Wipe regularly – Use a dry microfiber cloth after daily use. A soft brush removes dust weekly.
- Store properly – Always keep AirPods in a clean case to prevent dust buildup. Avoid pockets and bags filled with lint.
- Avoid moisture – Keep AirPods away from sweat, humidity, and wet hands. If used during workouts, wipe them immediately.
While regular cleaning prevents sweat buildup in AirPods, some headphones are built for workouts. Here’s a list of the best wireless headphones for the gym that won’t get damaged by moisture.
A little maintenance goes a long way. Clean them consistently, and they’ll sound great for years.
Keeping your AirPods Max ear cups free from dirt helps maintain comfort and sound quality. Learn the best way to clean them without damaging the material.
A clean microphone helps with call clarity, but some earbuds are built specifically for professional-grade call quality. Explore the top-rated earbuds for phone calls here.
FAQs:
Q1: Can I use water to clean my AirPods microphone?
No, Apple warns against using water. Even a small amount can damage internal components. Instead:
- Use a dry microfiber cloth or soft brush to clean the mesh.
- If needed, lightly dampen a cloth with 70% isopropyl alcohol, but avoid excess moisture.
Q2: What is the safest way to clean an AirPods Pro microphone?
The best way to clean an AirPods Pro microphone safely is to:
- Gently brush the mesh with a soft-bristled toothbrush.
- Use Blu Tack or cleaning putty to lift stuck debris.
- Wipe with a dry microfiber cloth for surface dust.
This prevents damage while keeping the microphone clear.
Q3: How do I remove stubborn earwax from my AirPods microphone?
If earwax is blocking the microphone:
- Brush the mesh lightly with a dry, soft toothbrush.
- Use Blu Tack by pressing it onto the mesh and lifting it away.
- Avoid pressing too hard—this can push wax deeper.
Regular cleaning prevents sound quality issues.
Q4: Can I use a toothpick or pin to clean the microphone mesh?
No, sharp objects can damage the microphone mesh. Instead, use:
- A soft-bristled brush to loosen dirt.
- A dry cotton swab to wipe away debris.
- Blu Tack or putty to safely remove trapped dust.
Avoid anything that could puncture or tear the delicate mesh.
Q5: Why does my AirPods microphone still sound muffled after cleaning?
If your AirPods mic is still muffled, try:
- Reset your AirPods – Forget them from Bluetooth settings and reconnect.
- Check for firmware updates – Outdated software can cause microphone issues.
- Test on another device – If it works elsewhere, it’s a device issue, not AirPods.
- Contact Apple Support – If the mic is still unclear, it may need repair or replacement.
For those using AirPods for gaming but experiencing microphone clarity issues, a dedicated wireless gaming headset might be the better solution here’s our top budget-friendly picks.
Conclusion:
A clean AirPods microphone is key to clear calls, crisp audio, and accurate voice commands. Over time, dust, earwax, and debris can clog the microphone mesh, leading to muffled sound and reduced performance. Following Apple-approved cleaning methods ensures your AirPods work like new without risk of damage.
To maintain optimal microphone quality:
- Clean your AirPods every 2-4 weeks using a soft brush, cotton swab, or Blu Tack.
- Avoid water, sharp objects, and compressed air, as these can cause permanent damage.
- Store AirPods in a clean case and wipe them down after daily use to prevent buildup.
- If the microphone still sounds muffled, reset your AirPods, check for updates, or contact Apple Support.
Regular maintenance helps extend the lifespan of your AirPods and ensures crystal-clear audio every time. Follow these simple steps to keep your AirPods in perfect working condition and avoid future microphone issues.
For more AirPods care tips and troubleshooting guides, check back for updates on keeping your AirPods performing at their best.


