


How To Connect Airpods to Laptop it seems straightforward, right? But if you’ve ever tried and hit a snag, you know it can get frustrating. Don’t worry, you’re not alone. Whether you’re on a Dell, HP, Lenovo, Acer, or Microsoft Surface or using different windows like windows 11, 8 or 7, we’re here to help you out. We’ll go through the steps together, and by the end, your AirPods will be connected smoothly. Let’s get started and make this process as easy as it should be.
Table of Contents
- How to Connect AirPods to a Windows Laptop
- How to Connect your Airpods to your MacBook
- Connect your Airpods to other different windows laptops and on different windows
- Why Connecting AirPods to Your Laptop is a Game-Changer.
- Detailed Troubleshooting: Fix AirPods Connection Issues Fast
- FAQS – How To Connect Airpods to Laptop
- Conclusion
How to Connect AirPods to a Windows Laptop
Time needed: 3 minutes
Need to connect your AirPods to your Windows laptop? Follow these simple steps to get everything set up in just a few minutes.
- Prepare Your AirPods
Place your AirPods inside their charging case and close the lid for a few seconds.
Ensure your AirPods have enough battery (at least 20%) for pairing.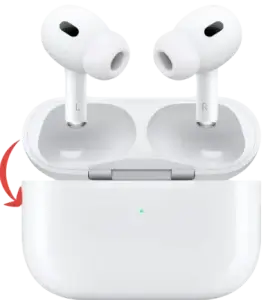
- Turn On Bluetooth on Your Windows Laptop
Click the Start Menu, then go to Settings.
Select Devices and then Bluetooth & other devices.
Make sure Bluetooth is turned on. If it’s off, toggle it to On.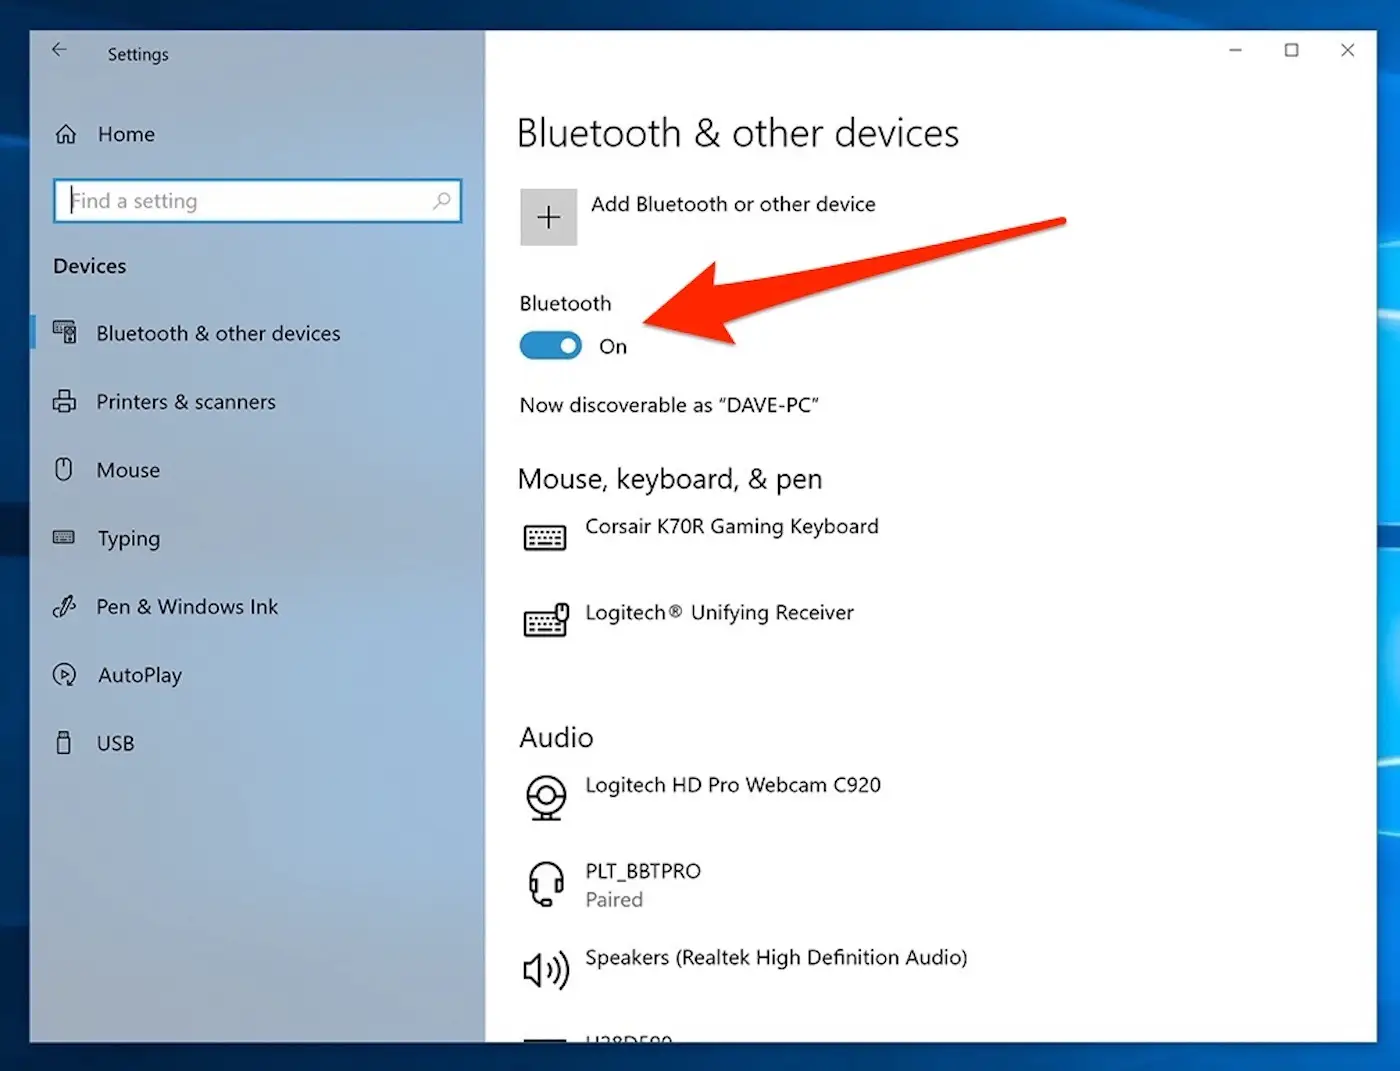
- Add Your AirPods as a New Bluetooth Device
In the Bluetooth settings, click on Add Bluetooth or other device.
Choose Bluetooth from the menu.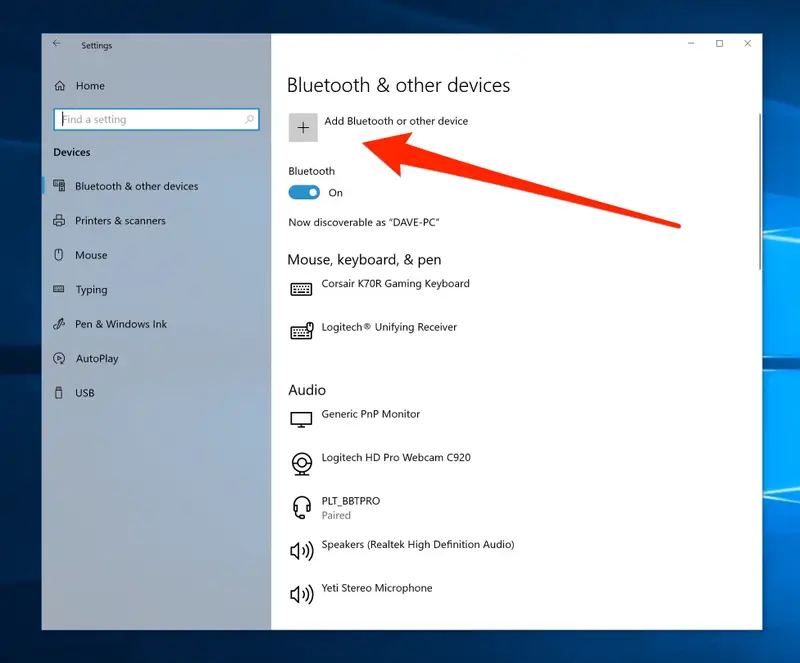
- Put Your AirPods in Pairing Mode
Open the AirPods case lid.
Press and hold the button on the back of the case until the LED light starts flashing white. This indicates your AirPods are ready to pair.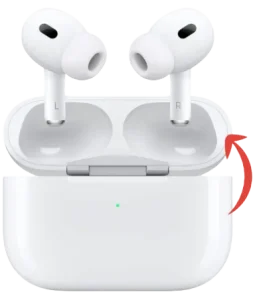
- Connect Your AirPods
In the list of available Bluetooth devices on your laptop, you should see your AirPods. Click on them to connect.
Once connected, a message will appear saying “Your device is ready to go.”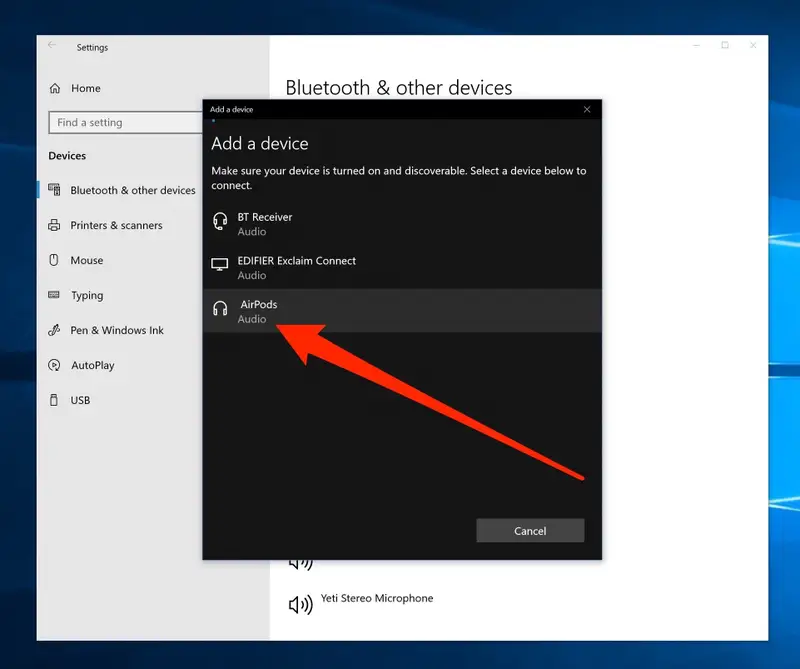
- Test Your AirPods
Play some audio or a video to ensure your AirPods are working correctly.
If the sound isn’t coming through your AirPods, go to Sound settings by right-clicking the sound icon in the taskbar and selecting your AirPods as the default audio device.
Take Your AirPods Experience to the Next Level!
Connected your AirPods to your laptop? Now, make the most of it! Upgrade to premium noise-canceling headphones for deeper bass, clearer calls, and immersive sound perfect for work, music, and gaming.
All products on Beats Insight are chosen by our experts independently, but we may earn a commission on purchases made through our links.
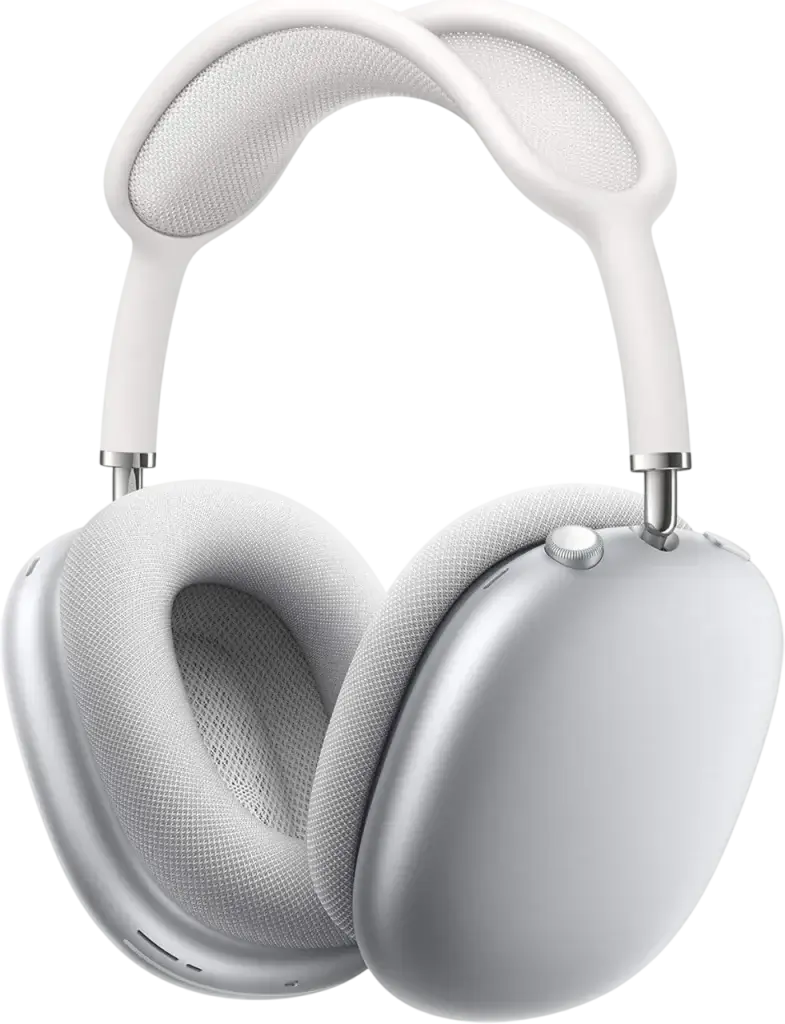
Apple AirPods Max
Experience high-fidelity audio with active noise cancellation.
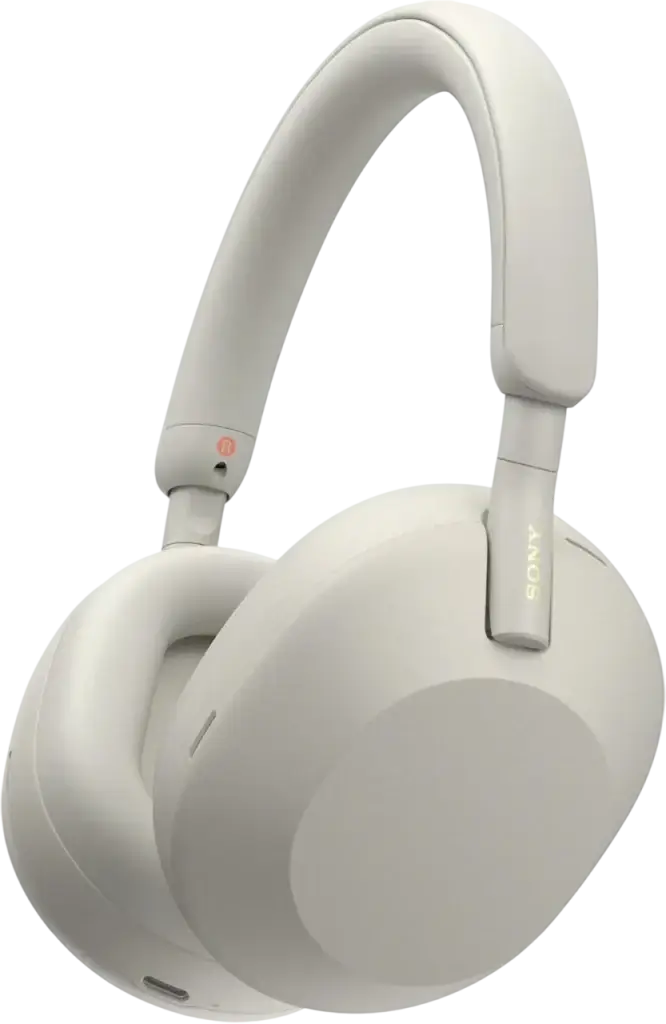
Sony WH-1000XM5
Industry-leading noise cancellation with superior sound quality.

Bose QuietComfort 45
Comfortable design with world-class noise cancellation.
Sennheiser Momentum 4
Exceptional sound with adaptive noise cancellation.
How to Connect your Airpods to your MacBook
Step 1: Check Your Mac’s Compatibility
Before connecting your AirPods, ensure that your MacBook is running a compatible macOS version. Follow these steps to check your macOS version:
1. Click the Apple Logo: Locate and click the Apple logo at the top left corner of your screen.
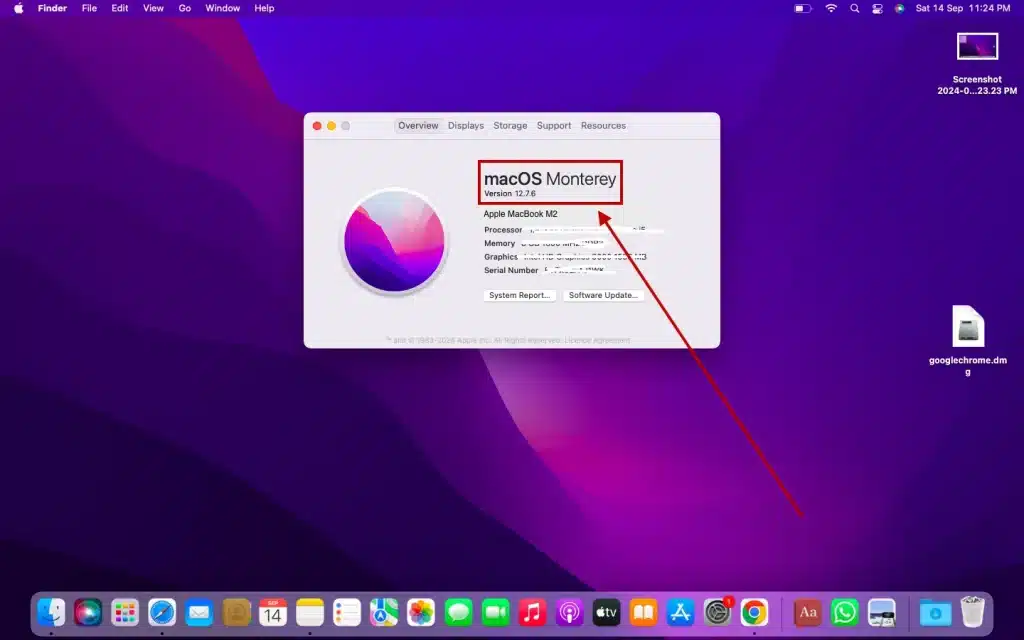
2. Select “About This Mac”: From the dropdown menu, click on “About This Mac.” This will open a window displaying your MacBook’s details, including the macOS version.
3. Check macOS Version: In the window that appears, look for the macOS version information.
- If it says macOS Mojave 10.14.4 or later, you can connect AirPods (2nd Gen).
- If it says macOS Monterey or later, you can connect AirPods (3rd Gen).
- If it says macOS Catalina 10.15.1 or later, you can connect AirPods Pro (1st Gen).
- For AirPods Pro (2nd Gen) or AirPods Max, it is recommended to use the latest macOS version for the best performance.
By following these steps, you can ensure that your MacBook is compatible with your AirPods model.
Step 2: Turn On Bluetooth on Your MacBook
To connect your AirPods, make sure Bluetooth is enabled on your MacBook. Follow these steps:
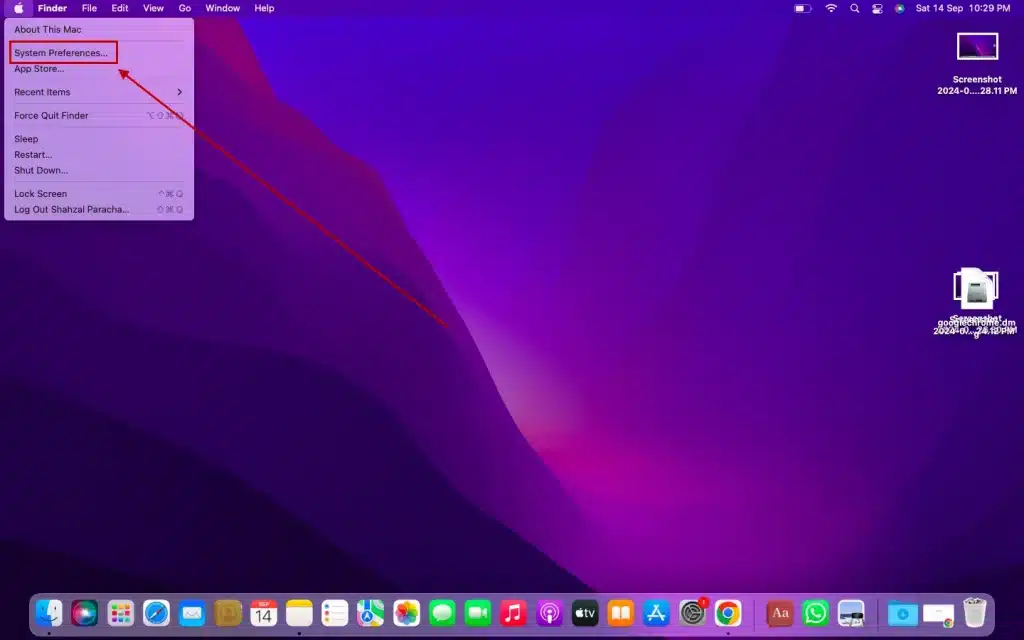
1. Click the Apple Logo: Locate and click the Apple logo at the top left corner of your screen.
2. Open System Preferences: From the dropdown menu, select System Preferences.
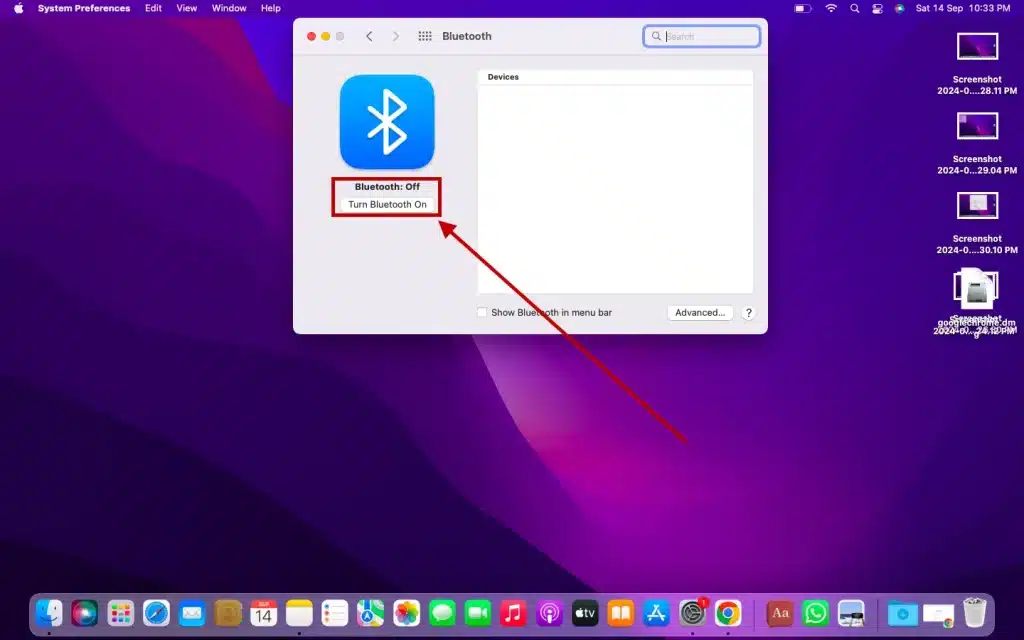
3. Select Bluetooth: In the System Preferences window, click on Bluetooth.
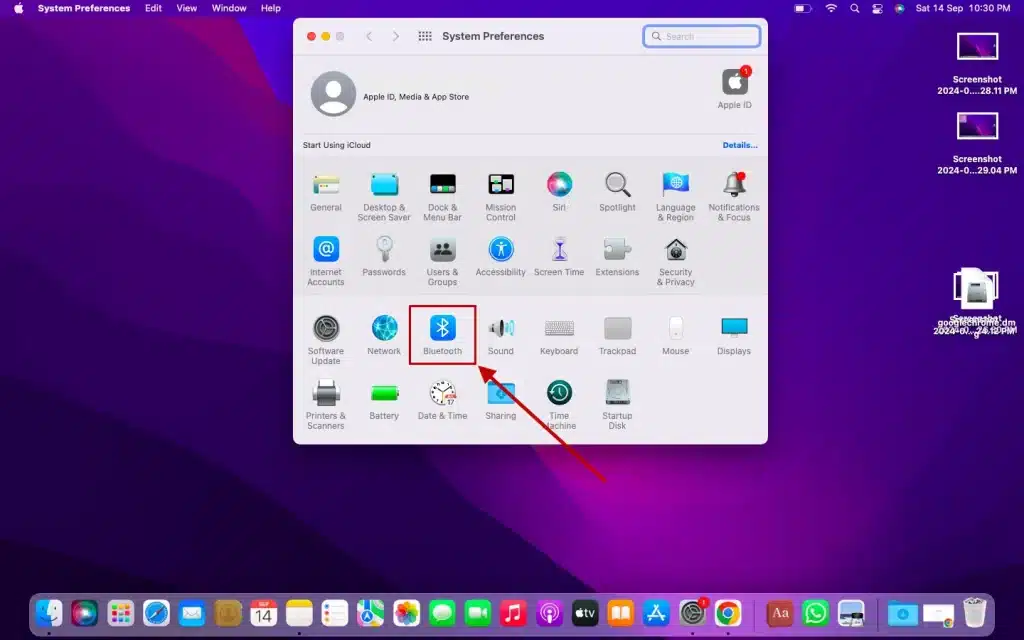
4. Turn Bluetooth On: If Bluetooth is off, click the Turn Bluetooth On button
Step 3: Put Your AirPods in Pairing Mode
Now, get your AirPods ready to pair:
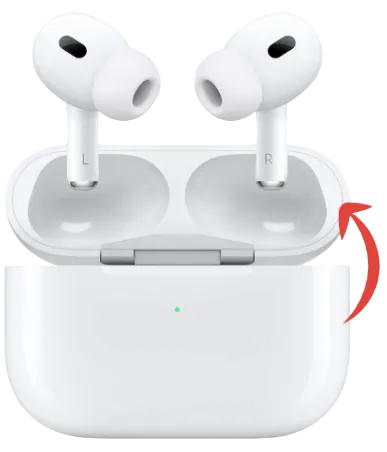
- Open your AirPods case (with the AirPods still inside).
- Press and hold the small setup button on the back of the case until the LED light flashes white. When you see that light, your AirPods are in pairing mode and ready to connect.
Step 4: Connect Your AirPods to Your MacBook
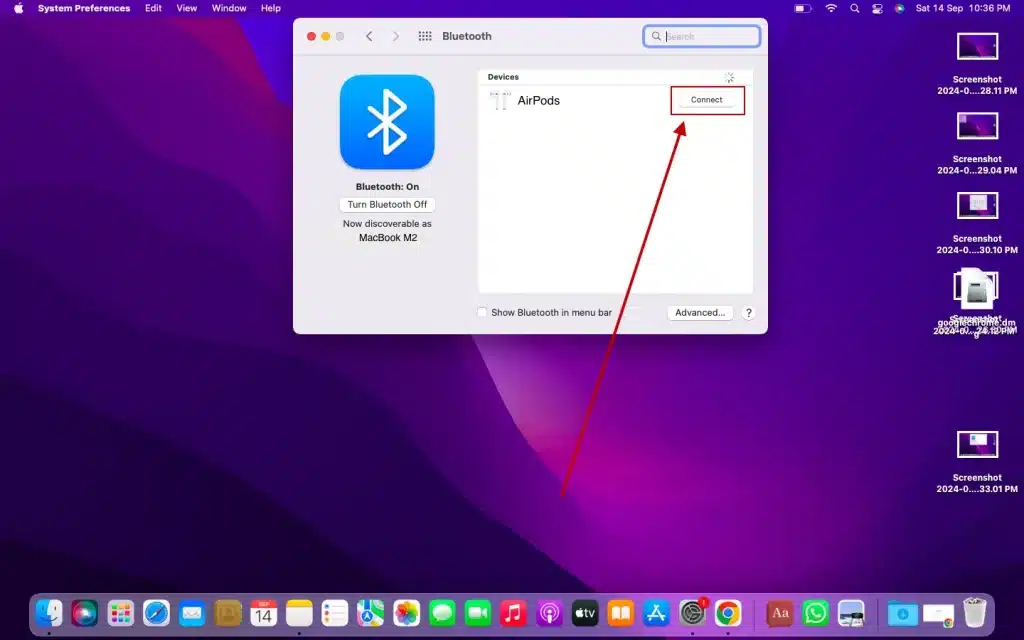
Once your AirPods are in pairing mode, it’s time to connect them:
- Back in the Bluetooth settings on your Mac, you should see your AirPods name pop up under the list of devices.
- Click on it, and select Connect.
- That’s it! You should now see a message saying you’re connected, and your AirPods are ready to use.
Step 5: Confirm the Connection
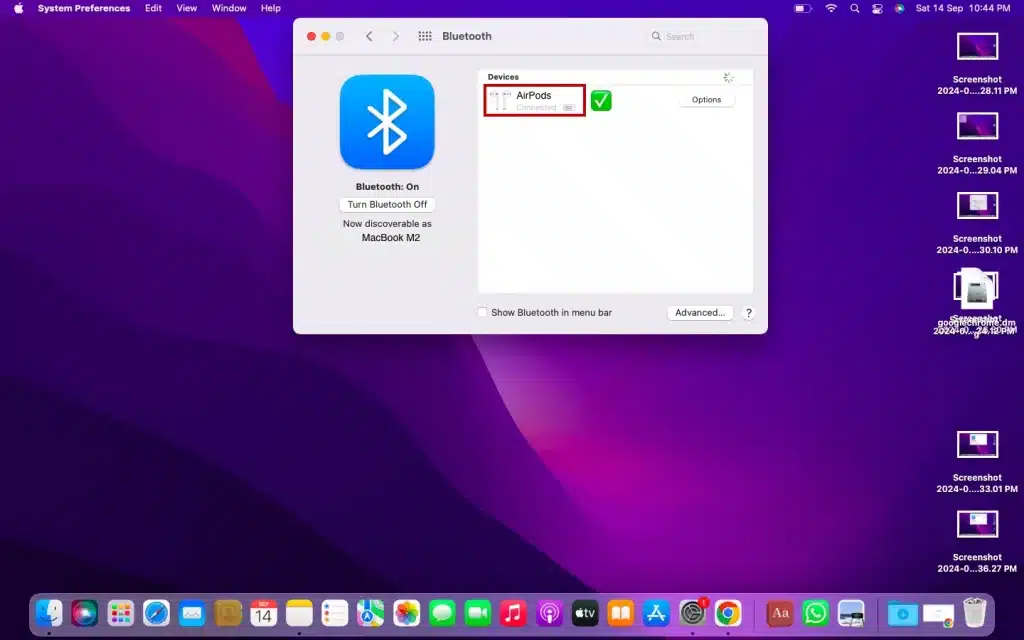
After clicking Connect, you will see a confirmation message indicating that your AirPods are connected and ready to use.
Step 6: Test the Connection
To make sure everything’s working properly, play some music, or open up a video. If the sound isn’t coming through your AirPods, here’s what you can do:
Go to System Preferences > Sound, and select AirPods as your output device.
If you’re using Airpods Max, here’s a quick guide on How To Connect Airpods Max To Pc
Connect your Airpods to other different windows laptops and on different windows
How to Connect Airpods to Dell Laptop
Follow these easy and simple steps on How to Connect Airpods to Dell Laptop fast.
1: Turn On Bluetooth
- On your Dell laptop, click the Start Menu and go to Settings.
- Select Devices > Bluetooth & other devices.
- Make sure Bluetooth is turned on. If it’s off, switch it to On.
2: Put AirPods in Pairing Mode
- Open the AirPods case with the AirPods inside.
- Press and hold the button on the back of the case until the LED light flashes white. This means they’re ready to pair.
3: Connect AirPods to Dell Laptop
- In the Bluetooth & other devices menu, click Add Bluetooth or other device.
- Choose Bluetooth from the list.
- When your AirPods show up in the list of available devices, click on them to connect.
4: Confirm the Connection
- A message will pop up saying “Your device is ready to go.”
- Test the connection by playing some audio or a video to ensure it’s working.
Troubleshooting Tips
- AirPods not connecting? Turn Bluetooth off and on, or restart your Dell laptop.
- Still having issues? Reset your AirPods by holding the button on the case until the light flashes amber, then white. Try pairing again.
If you’re using Tozo earbuds, here’s a quick guide on how to reset Tozo earbuds.
How to connect airpods to hp laptop
Follow these simple steps to get them paired quickly.
1: Turn On Bluetooth
- On your HP laptop, click the Start Menu and go to Settings.
- Select Devices > Bluetooth & other devices.
- Ensure Bluetooth is turned on. If it’s off, toggle it to On.
2: Put AirPods in Pairing Mode
- Open the AirPods case with the AirPods inside.
- Press and hold the button on the back of the case until the LED light flashes white. This indicates they’re ready to pair.
3: Connect AirPods to HP Laptop
- In the Bluetooth & other devices menu, click Add Bluetooth or other device.
- Choose Bluetooth from the options.
- When your AirPods appear in the list of available devices, click on them to connect.
4: Confirm the Connection
- You’ll see a message that says “Your device is ready to go.”
- Test the connection by playing some audio or a video to ensure everything’s working properly.
Troubleshooting Tips
Still having issues? Reset your AirPods by holding the button on the case until the light flashes amber, then white. Try pairing again.
AirPods not connecting? Turn Bluetooth off and on, or restart your HP laptop.
How to connect airpods to lenovo laptop
Follow these easy steps to get connected fast.
1: Turn On Bluetooth
- On your Lenovo laptop, click the Start Menu and head to Settings.
- Select Devices > Bluetooth & other devices.
- Ensure Bluetooth is turned on. If it’s off, switch it to On.
2: Put AirPods in Pairing Mode
- Open the AirPods case with the AirPods inside.
- Press and hold the button on the back of the case until the LED light flashes white. This means they’re ready to pair.
3: Connect AirPods to Lenovo Laptop
- In the Bluetooth & other devices menu, click Add Bluetooth or other device.
- Select Bluetooth from the list.
- When your AirPods appear in the list of available devices, click on them to connect.
4: Confirm the Connection
- A message will pop up saying “Your device is ready to go.”
- Test the connection by playing some audio or a video to ensure it’s working properly.
Troubleshooting Tips
Still having issues? Hold the button on the case until the light flashes amber, then white, to reset your AirPods. Try pairing again.
AirPods not connecting? Try turning Bluetooth off and on, or restart your Lenovo laptop.
How to connect airpods to acer laptop
Step 1: Turn On Bluetooth on Your Acer Laptop
First things first, you need to make sure Bluetooth is enabled on your laptop. If it’s already on, great you’re halfway there! If not, here’s what to do:
- Click the Start Menu and open Settings.
- In Settings, go to Devices, then select Bluetooth & other devices.
- Look for the Bluetooth toggle switch. If it’s off, just flip it to On.
Step 2: Put Your AirPods in Pairing Mode
Now that Bluetooth is on, it’s time to get your AirPods ready to pair. This part is super easy:
- Open the AirPods case (make sure the AirPods are inside).
- Press and hold the button on the back of the case until the LED light flashes white. When it’s flashing, you know the AirPods are in pairing mode and ready to connect.
Step 3: Connect Your AirPods to the Laptop
Now, here’s the fun part actually connecting them:
- Go back to Bluetooth & other devices on your Acer laptop.
- Click Add Bluetooth or other device.
- Choose Bluetooth from the options that pop up.
- In a few seconds, you’ll see your AirPods show up in the list of available devices. Click on them, and voilà, you’re connected.
Step 4: Test the Connection
At this point, a message should pop up saying, “Your device is ready to go.” Now, to make sure everything’s working, play some music or a video to test the sound. If everything’s coming through your AirPods, congrats you’re good to go!
How to connect airpods to surface laptop
Step 1: Turn On Bluetooth on Your Surface Laptop
Before connecting your AirPods, make sure Bluetooth is enabled on your Surface laptop:
- Click the Start Menu and select Settings.
- In the Settings menu, choose Devices.
- Click on Bluetooth & other devices, and then make sure the Bluetooth toggle is switched On.
Step 2: Put Your AirPods in Pairing Mode
Next, let’s get your AirPods ready for pairing:
- Keep your AirPods in the charging case and open the lid.
- Press and hold the button on the back of the case until the LED light flashes white. This means your AirPods are now in pairing mode and ready to connect.
Step 3: Pair AirPods with Your Surface Laptop
Now, it’s time to pair your AirPods with your Surface laptop:
- On your Surface, go back to the Bluetooth & other devices menu.
- Click Add Bluetooth or other device.
- Select Bluetooth from the list of options.
- Your Surface will search for nearby devices. Once your AirPods appear in the list, click on them to connect.
- After a few seconds, a message will pop up saying, “Your device is ready to go.”
Step 4: Test Your AirPods
To make sure everything is working as expected, try playing some audio—whether it’s music, a video, or a Zoom call. The sound should come through your AirPods. If it doesn’t, you may need to go to Settings > System > Sound and select your AirPods as the default output device.
Looking to connect other devices? Learn how to connect Edifier speakers to your laptop for the best audio experience.
How to connect airpods to laptop windows 11
1. Turn on Bluetooth
- Click on the Start Menu and go to Settings.
- Head over to Bluetooth & devices, and make sure Bluetooth is turned on.
2. Put Your AirPods in Pairing Mode
- Open the AirPods case, and press the button on the back until the LED light flashes white.
3. Connect AirPods
- Back in the Bluetooth & devices settings, click Add Device.
- Choose Bluetooth, and wait for your AirPods to show up in the list.
- Click on your AirPods, and boom you’re connected.
How to connect airpods to laptop windows 8
1. Enable Bluetooth on Your Laptop
- From the Start screen, swipe in from the right or move your mouse to the upper-right corner to open the Charms bar.
- Click Settings, then select Change PC settings.
- Go to PC and Devices, then find Bluetooth and switch it to On.
2. Pair Your AirPods
- Keep the AirPods in their case and open the lid.
- Hold the button on the back until the light flashes white.
3. Connect AirPods to Your Laptop
- Click on your AirPods and follow the instructions to connect them.
- In the Bluetooth settings on your laptop, your AirPods should appear in the list of devices.
How to connect airpods to laptop windows 7
1. Turn on Bluetooth
First, make sure Bluetooth is even enabled on your laptop. Windows 7 hides it a bit.
- Click on the Start Menu and go to Devices and Printers.
- At the top, click Add a device.
- If Bluetooth isn’t already on, you’ll need to enable it (if your laptop has it). If it doesn’t, you might need a Bluetooth adapter.
2. Get Your AirPods Ready to Pair
- Open the AirPods case, leaving the AirPods inside.
- Hold down the button on the back of the case until the light starts blinking white. Now your AirPods are in pairing mode.
3. Connect AirPods to Your Laptop
- Click on them to connect and follow any prompts that pop up.
- Back in the Add a device menu on your laptop, you should see your AirPods show up.
Why Connecting AirPods to Your Laptop is a Game-Changer.
Have you ever thought about how much easier things could be with AirPods connected to your laptop? Imagine this, You’re working from home, maybe jumping between Zoom calls, and you don’t have to worry about wires getting tangled up. It’s not just about convenience, it actually makes your life easier.
Using AirPods with your laptop can turn an ordinary workday into something a bit more flexible. And when it’s time to relax, the experience is just as smooth. Whether you’re streaming your favorite show or listening to music, the sound quality is top-notch.
And here’s the thing, so many people are already doing this. It’s no wonder AirPods have become the go-to choice for folks looking to improve their laptop experience. It’s one small change that makes a big difference.
Detailed Troubleshooting: Fix AirPods Connection Issues Fast
Even the best devices can hit a snag, and AirPods are no exception. If your AirPods won’t connect or keep dropping from your laptop, follow these detailed troubleshooting steps to get back on track.
Step 1: Remove AirPods from the Bluetooth List
If your AirPods refuse to connect, you may need to start from scratch. Here’s how to remove them from your Bluetooth list:
- Go to Settings on your laptop and click on Bluetooth & Other Devices.
- In the list of connected devices, find your AirPods and select Remove Device.
- Restart your laptop, and then follow the pairing steps again to reconnect.
Step 2: Reset Your AirPods
A full reset can often solve persistent connection problems. Here’s how to do it:
- Place your AirPods in their case and close the lid for 30 seconds.
- Open the lid and press the setup button on the back until the LED light flashes amber, then white.
- Go back to your Bluetooth settings and re-pair your AirPods.
Step 3: Update Bluetooth Drivers
Outdated Bluetooth drivers can cause connection issues. Here’s how to update them:
- Open Device Manager on your Windows laptop.
- Expand the Bluetooth section, right-click on your Bluetooth adapter, and select Update driver.
- Follow the prompts to download the latest version. Once updated, try pairing your AirPods again.
Step 4: Reset Network Settings on macOS
If you’re on a Mac and still having trouble, try resetting your network settings:
- Navigate to System Preferences > Network.
- Select Bluetooth PAN and hit the minus (-) button to remove it.
- Restart your Mac, and then add your AirPods back to Bluetooth.
Quick Troubleshooting Tips:
- Switch Bluetooth Off and On: Sometimes, a quick toggle of your Bluetooth settings can solve minor connection glitches.
- Restart Your Laptop: When in doubt, rebooting your device can often resolve any software hiccups causing connectivity issues.
- Check AirPods Battery Levels: Ensure your AirPods have at least 20% battery before trying to pair.
With these detailed troubleshooting steps, you’ll be able to resolve most connection problems in minutes, ensuring smooth audio experiences whether you’re working, streaming, or gaming.
For more detailed troubleshooting steps, visit Apple’s official support page for AirPods.”
Having trouble connecting other earbuds? Check out our guide on how to pair JLab earbuds with any device.”
FAQS – How To Connect Airpods to Laptop
AirPods may not connect to a laptop due to Bluetooth issues. Try turning Bluetooth off and on again to reset the connection. This often resolves the problem and allows your AirPods to pair with your PC.
To put AirPods in pairing mode, open the case and hold the Setup button on the back until the LED light flashes white. This indicates that the AirPods are ready to pair with a device.
To get your earbuds working on Windows 11, right-click the Start menu, select System, then Sound. Ensure your headphones are set as the default device under Output. If not, select them and reconnect.
Yes, you can use Apple earbuds on a PC. Simply connect them via Bluetooth. Both Windows 10 and Windows 11 support easy pairing with Apple earbuds through their Bluetooth settings.
Yes, AirPods can connect to any non-Apple laptop that has Bluetooth, such as those running Windows or Linux. The pairing process is similar to that of Apple devices.
To switch AirPods between devices, disconnect them from the current device and then pair them with the new device through Bluetooth settings.
To disconnect your AirPods, go to your laptop’s Bluetooth settings, find your AirPods in the list of connected devices, and click Remove or Disconnect.
Conclusion
Connecting your AirPods to your laptop doesn’t have to be a headache. Now that you’ve got the steps down, you should be able to handle it with ease. And if you run into any issues, you know exactly what to do.
If this guide helped you out, feel free to bookmark it for the future or share it with someone who might need it. We’d love to hear how it went for you, so drop a comment and let us know your experience.
Looking for more tips and tricks on how to get the most out of your tech? Check out our other articles we’ve got plenty of advice to help you optimize your devices!